New instrument isolation techniques
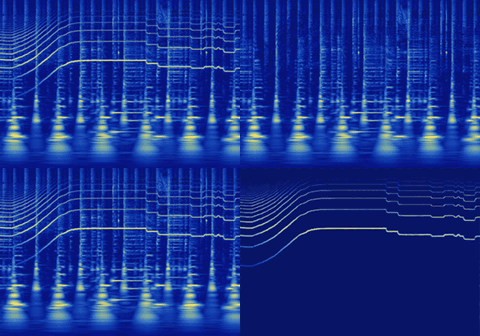
During the last few weeks, Photosounder received the additions of new functions that allow for instrument isolation to be done all in Photosounder, simply and quickly, without the use of any external program.
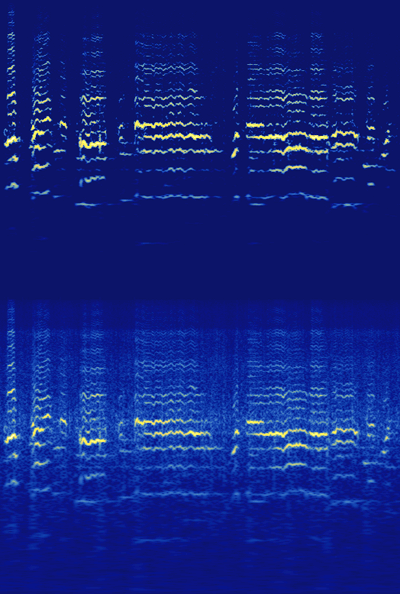
In this video we see how to extract a continuous synth line graphically using those new tools. This synthesiser is harmonic, which means it is composed of vertically stacked parallel lines, separated by constant vertical distances. It is crucial to be able to identify the position of the base frequency, which is the lowest of those lines. It might not always be easily seen, and sometimes it's entirely absent. To help you find that base frequency, you can, using any brush tool and the harmonics modifier (the button with four vertically stacked dots), hover over the image to see an overlay of the first few harmonics and with your mouse cursor try to match the cross hair overlay with the lines on the screen. This is fairly straightforward, however things can sometimes be a bit confusing. It is best to try what seems like the lowest possibility first in order to avoid confusing the first harmonic (the second line from the bottom) with the base frequency (the first line), but in the case of a chord, it is best to try to erase the higher notes first.
In this example there are no chords, and the base frequency is easily seen. The synth line is also quite strong compared to the rest of the instruments, meaning we can safely use the magnet modifier so that the cursor will effortlessly snap to the synth's curves.
Using the smart erase tool (represented by a road roller icon), the harmonics modifier that reproduces the smart erase tool's action on every harmonic, and the magnet modifier to snap to the curves we can now erase the synth by spraying over it from left to right. The 'Tool intensity' should be set to 100%, the 'Spray width" anywhere between 10 and 20 pixels. Also you'll most likely want to hold the H key during the erasure. This slows down the mouse cursor 32 times by default as to give you more precision.
This gives you an image and sound practically devoid of the removed instrument. We want the opposite, which we obtain by pressing the Mask Invert button. Make sure the lossless mode is turned on for best results.
At this point the result might not be fully satisfactory, but this is most of the job done. Further work can be done to clean up/fix the image further, included using external programs such as Adobe Photoshop or GIMP.
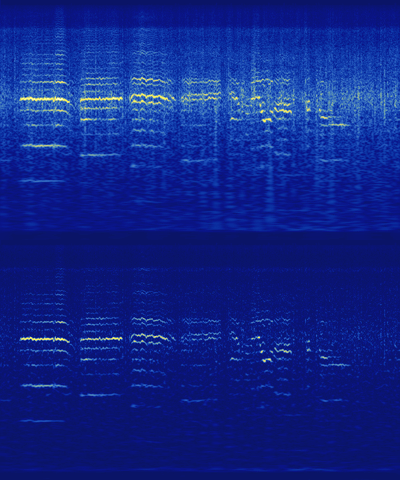
Horns, such as in this video, offer a different kind of challenge. Identifying the base frequency can be more tricky, one reason being that the base frequency can be pretty low in pitch, giving it a lower graphical resolution to work with. Also the lines that make up a horn note are less smooth and regular, however this in turn is an advantage, it makes the result more forgiving to irregularities.
Because of these characteristics, it is recommended to change a few parameters in the file config.txt. In this video the min_bpo setting was changed to 12 instead of 24 to have a better time resolution in the area of the base frequencies of the horns. The pixels_per_second parameter was lowered from 100 to 50 because overall not so much time resolution is needed here. More importantly, the bands_per_octave parameter which defines the vertical resolution was increased from 60 to 180, this is because the harmonics of the horns reach quite high, and as harmonics go up they get closer to each other. With a bands_per_octave setting of 60, after the 30th harmonic or so all harmonics are merged together. Increasing that setting allows them to remain separated and hence more readily separable. For the same reason, the spray_harmonics setting which defines how many harmonics the harmonics modifier works on was increased from a default of 20 to 100.
The instruments were removed in the same way as in the previous video, with a few exceptions. Firstly, it's a bit harder to identify the base frequencies of each note in this sample, but it was also harder to identify what belong to which instrument, so it took a bit of trial-and-error. Also, the magnet modifier was turned off, for two reasons: because the instrument being removed was less strong the magnet modifier was less efficient, and because most notes are straight lines it's just as easy to follow without the magnet modified. The H key was still held down for precision.
After the erasing the desired instruments and doing the Mask Invert, we can notice a couple of issues with the image and the sound. We can see and hear remains of the hi hats which were caught up in the higher harmonics, and we also notice that the chords are much louder than the parts with single notes. The first issue can be simply be solved using the dark spray tool, without any modifier turned on, and with a decreased Tool intensity. This editing is best done by temporarily turning up the Gamma as to see better what's being done.
The second issue comes from the fact that when we remove chords we make as many passes as there are notes, and because there is much overlap in the harmonics it is equivalent to removing the same thing many times, which results in louder chords than should be. This can be solved using the rectangle tool. Using it, by dragging an area on the screen by pressing the right mouse click (which lightens the area by the ratio defined by Tool intensity, the left mouse click in turn darkens the area by the same ratio), you can make the passages devoid of chords brighter and in turn louder.
As said earlier, this type of instrument is more forgiving than the smooth flat synth line in the first example, and it takes less work to obtain a satisfactory result. Again however, the results can be further improved.
Labels: experiments, filtering, lossless, tutorial


 Note that when you're done, you might want to double-pass the processing to obtain a result more faithful to the actual image you obtained. To do that, normally load the image in lossless mode in